Pupil Capture Settings
This tutorial shows you how to set the pupil capture parameters correctly and how to use the calibration with the dynamic calibration markers of our framework. How to install Pupil Capture, please check our installation tutorials.
-
- Select Unity Stream as Capture Selection in the world window and activate the Unity Capture (Figure 1 )
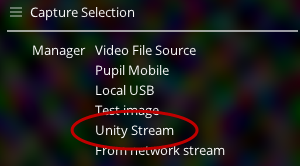
Figure 1: Section Capture Selection for use of Unity Stream
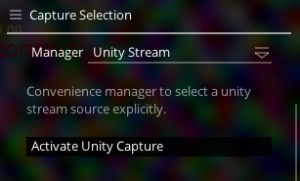
Figure 2: Selection Unity Stream
-
- Open an eye window by activating Detect Eye 0 or Detect Eye 1. Whereby Eye 0 is for the left eye from the subject’s perspective, Eye 1 for the right one (Figure 3).
- Open an eye window by activating Detect Eye 0 or Detect Eye 1. Use one for monocular eye tracking or two for binocular (Figure 3). Note the detection & mapping mode is on 2d.
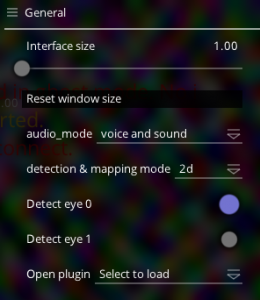
Figure 3: General settings with the left eye activated
-
- Select the USB camera for eye tracking by selecting Local USB as Capture Selection in the eye window. Afterwards select the camera in the Activate source list (Figure 4).
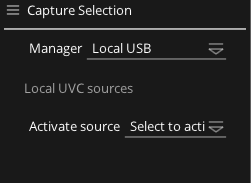
Figure 4: Activating Local USB
-
- Now set the mode to ROI in the general settings of the eye window (Figure 5).

Figure : Select Mode ROI
-
- After this the test person look to the left, to the right, up and down. Decrease the size of the shown rectangle while the pupil has to be always inside of the rectangle. You can change the size of the rectangle by grabbing the circles in the corners. Figure 6 shows how the rectangle should be fitted around the eye.
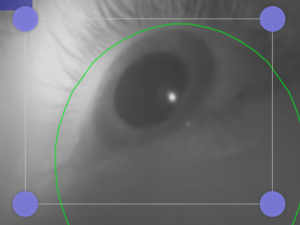
Figure 6: The rectangle fitted around the eye
-
- Test which settings for Pupil intensity range, Pupil min, and Pupil max result in the most accurate eye tracking by using the slider (Figure 7).
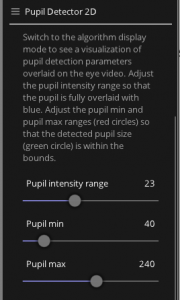
Figure 7: The settings for the pupil detection
-
- For calibrating the eye tracking you have to switch over to the world window. Choose the right calibration (Manual Marker Calibration) as shown in figure 8. Then press the left button (X) on the remote control and let the test person look around to place the appeared marker in the center of the screen.
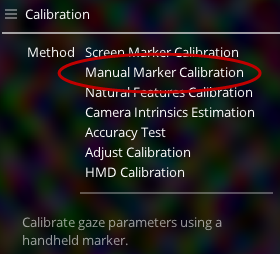
Figure 8: Selection calibration method
-
- Click the C on the left hand side of the world window or use the c key to start the calibration. Now a small circle will appear in the upper left hand corner (Figure 9) and fill itself when the marker is detected and the subject looking at it.
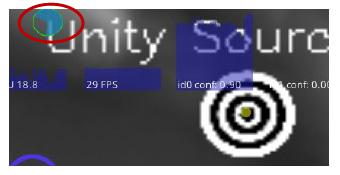
Figure 9: The circle indicating during the calibration
-
- Every time the circle is full, press the left button (X on the remote control) again, to move the marker to the next position. After nine positions, click C again to complete the calibration. You can press the right button (triangle) to make the marker disappear.
- Check the accuracy and repeat the calibration if necessary.