Unity and Pupil Capture Installation
The tutorials on this page shows you how to install Unity and Pupil Capture properly on Windows and Mac. The PDF-Version of these tutorials are available at our download section.
Content:
Unity Installation
Estimated time for installation: 1 hour 30 minutes
Unity
Unity is a 3D engine for multi-platform game development. It’s a tool to create 3D and 2D games with a focus on easy entry area for developers. We use Unity to build virtual reality and augmented reality applications.
-
- Download Unity version 5.5.1 and install it.
- In the next step create a new project. Click on the “NEW” button (Fig. 1.1.1) and fill in the details of the project (Fig. 1.1.2). The project name and its location are up to your personal preference.

Figure 1.1.1: Launch menu of Unity: The red circle marks the button for creating a new project.
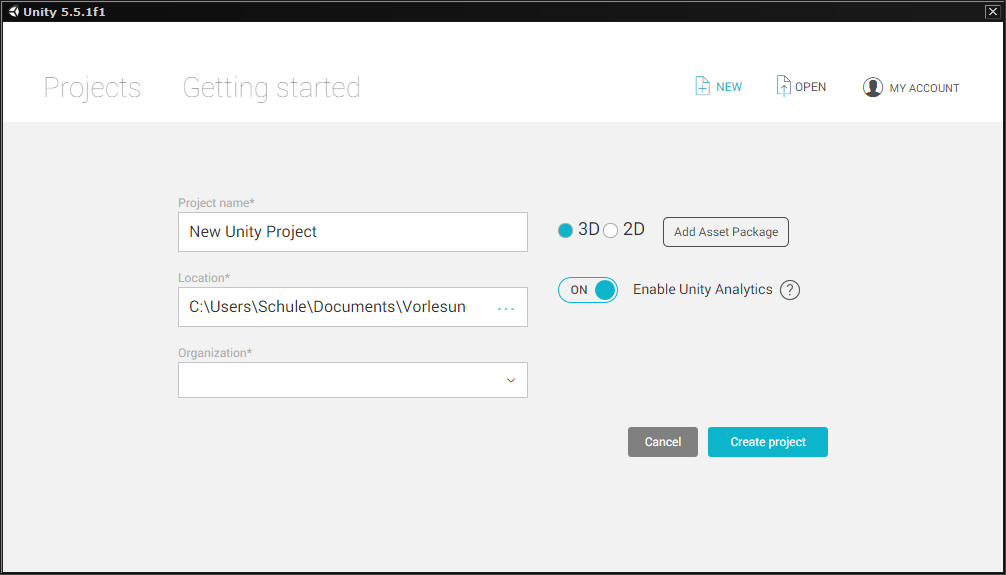
Figure 1.1.2: New Unity project window.
- Import the provided unitypackage “PGBullsEye“ into the newly created project. To do this choose Assets -> Import Packages -> Custom Packages -> PGBullsEye (Fig. 1.1.3). This import might take up to several minutes.

Figure 1.1.3: Import the Unity package “PGBullsEye”
Android SDK
The Android Software Development Kit (SDK) is required to build applications for Android smartphones. Unfortunatly you can’t download the Android SDK seperatly, it can be only downloaded along with the Integrated Development Environment (IDE) Android Studio.
-
- First download Android Studio, install and start it. Click on Configure -> SDK Manager to open the SDK Manager (see figure 1.2.1).
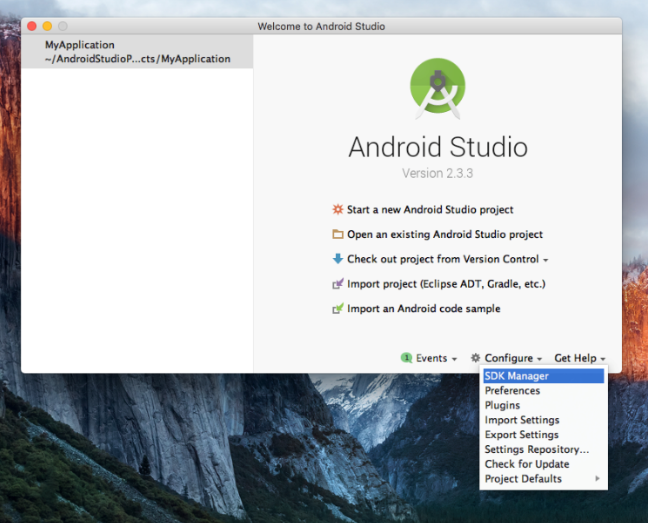
Figure 1.2.1: Launch menu of Android Studio
-
- Under Android SDK -> SDK Platforms select Android 7.0 Api 24 (Figure 1.2.2). This Android version is required to build the android application with Unity 5.5.1f.
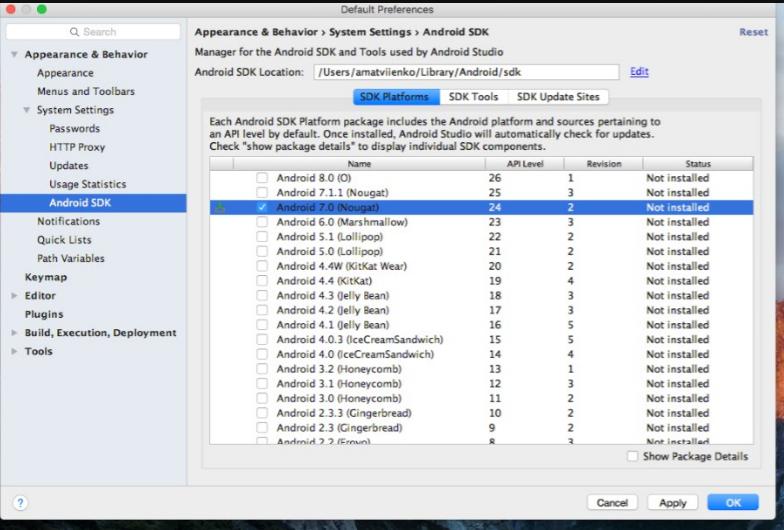
Figure 1.2.2: Selection of Android 7.0 in the SDK Manager
-
- For SDK Tools select the three elements (Figure 1.2.3) and click on apply. The specified items are downloaded. This may take some time. Note the path of the AndroidSDKLocation.
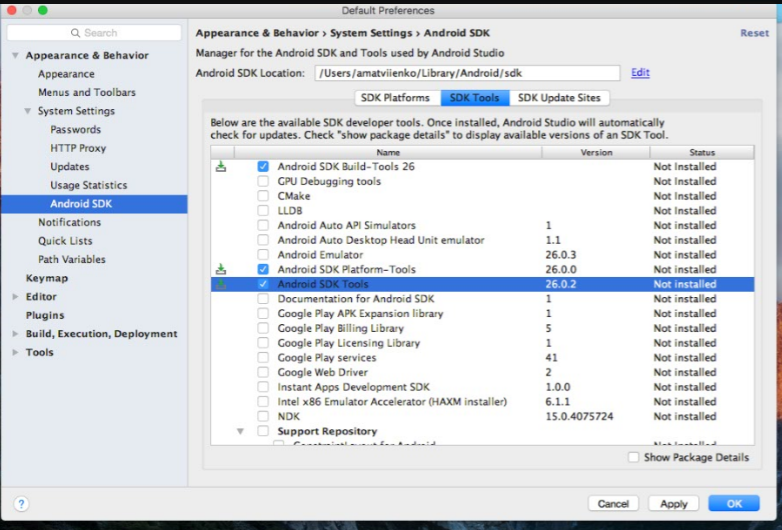
Figure 1.2.3: Selection of Android SDK Tools, Build-Tools and Platform-Tools in the SDK Manager
-
- Open unity as described above. Go to File -> Build Settings select Android as a platform and click Switch Platform.
- Go to Unity -> Preference -> External Tools and enter the previously noted AndroidSDKLocation (Note that this is JDK8).
- Unzip the file “tools_r25.2.5” and overwrite the path from the old SDK version wirh the unzip file.
The next step is optional and shows how you could get your android device recognized by your system.
The following steps will be done on the corresponding smartphone device:
To enable USB debugging, you need to enable Developer options. To do this, find the build number in your device’s Settings menu. The location of the build number varies between devices. The stock Android setting can be found by navigating to Settings > About phone > Build number. For different devices and Android versions, refer to your hardware manufacturer (see fig. 1.2.4).
Note: On operating systems older than Android 4.2 (Jelly Bean), the Developer options aren’t hidden. Go to Settings > Developer options, then enable USB debugging. After you have navigated to the build number using the instructions above, tap on the build number seven times. A pop-up notification saying “You are now X steps away from being a developer” appears, with “X” being a number that counts down with every additional tap. On the seventh tap, Developer options are unlocked. Go to Settings > Developer options, and check the USB debugging checkbox to enable debug mode when the device is connected to a computer via USB (see fig. 1.2.5).
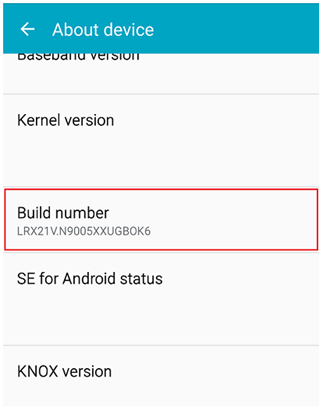 Figure 1.2.4: Tipping on the build number in the phone settings
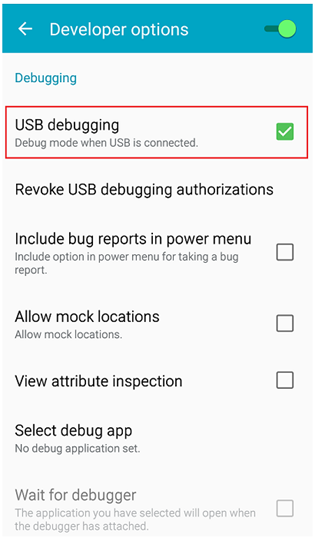 Figure 1.2.5: Enable USB debugging in the developer options
Pupil Capture Installation
Estimated time for installation: 30 minutes
Pupil Capture is an eye tracking software by Pupil Labs and is used by our framework. It’s open source and you can easily expand it with own plugins. This chapter describes all the steps for installing the PyUVC driver on Windows,
which is neccessary to use a camera for Pupil Capture. Before the plugin can be initialized, please refer to this webpage to find the correct version which matches your OS. Preferably v0.9.12.
PyUVC driver installation for Pupil Capture
-
- Download and install the driver libusbk 3.0.7.0.
- Next download Zadig.
- Connect your camera with the computer.
- Run Zadig and open Options. You can see all currently selected option. Select and deselect the options according to figure 2.1.1
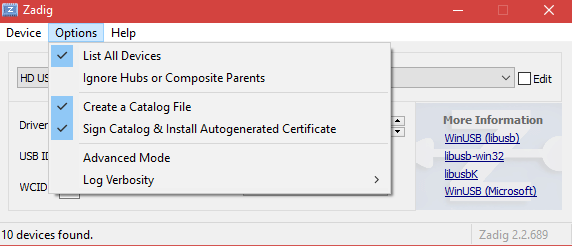
Figure 2.1.1: Selected options
-
- Now you should see a list of all connected USB devices. Select your device, which is marked with the addition “composite parent”. A possible selection is shown on the figure 2.1.2.
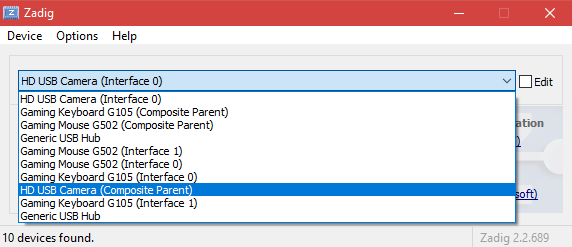
Figure 2.1.2: Example USB camera
-
- Set the driver of your device on “libusbK (v3.0.7.0)” and press “replace driver”(Fig. 2.1.3)
- Start Pupil Capture and verify that the driver installation was successful by selecting the camera as the USB device. If this is not the case, please run the driver installation again.
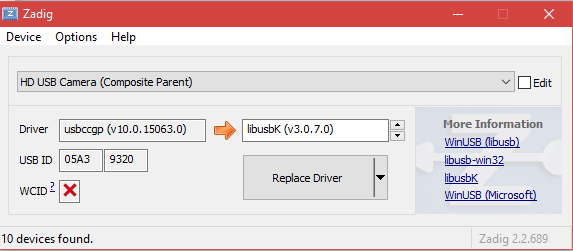
Figure 2.1.3: Driver selection
Plug-In Integration
Once the Pupil Capture software and the drivers are installed, the last step will be integrating our plugin for video streaming. Just follow these few steps:
- If you haven’t done it yet, run Pupil Capture once. This should create a directory called “pupil_capture_settings” in your home directory e.g. /Users/ < username > (Windows), /Users/ < username > (Mac).
- Locate the directory called “plugins” in this folder and drop our python file “unity _streaming _plugin” here.
- After restarting Pupil Capture the software should load the plugin automatically, and an additional capture source for streaming video data from an Unity application should appear in the capture selection selector in the world window.